


Thursday, November 17, 2011
Love You
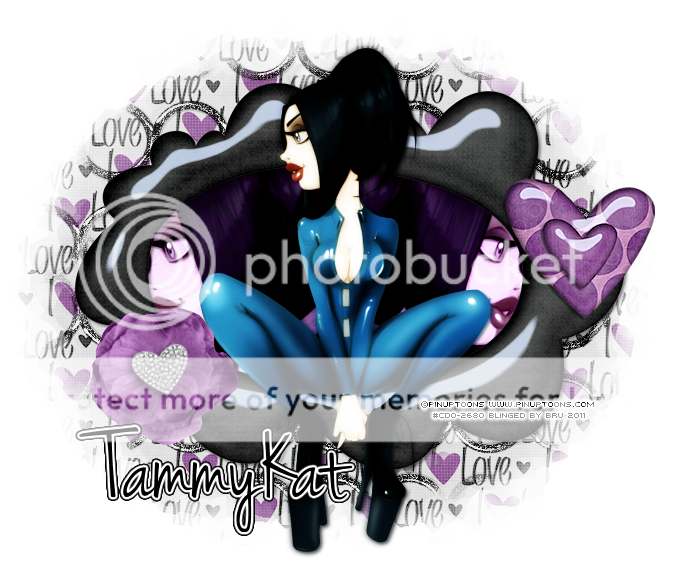
*Click the tag for full view*
This tutorial was written by Brunette on November 17th 2011.
Any similarity to any other tutorial is purely coincidental.
Do not copy and paste my tutorials or claim as your own you may link to them for group challenges.
What you'll need:
You'll need a tube of choice I am using the a tube by PinupToons. You can purchase his art for signature tags at Creative Design Outlet HERE.
Be sure to check out all the other great artists there!
Fonts of choice - I am using a pixel font for the copyright and Jenna Sue for the name.
A kit of choice I am using part of a AWESOME collab kit by the girls at Pimp my Tags with Scraps which is called Girls of Pimp my tags with scraps which you can purchase HERE.
I am using TammyKats portion.
Eye Candy 4000 - Gradient Glow
Mask of choice - mine is from weescottlass creations which you can find HERE.
I used mask number 219 you'll see on the right side they are bundled in bulk downloads :)
Ready?
Let's get started!
Open up a new 700x700 transparent canvas I always crop it later so it will be smaller I just like enough room to work.
Open up doodleframe 3 from the kit copy and paste it as a new layer onto your canvas. Now take your magic wand and select INSIDE the frame then go to selections-modify-expand by 3 then open up a paper of choice I used the purple scratchy paper then paste it as a new layer, go to selections invert and hit delete. DO NOT deselect yet. Open up your tube mine came with a close up but you don't really need one, copy and paste it in the frame arrange it how you want and hit delete again. Duplicate and mirror this layer, merge them together and duplicate change the blend mode of the top layer to soft light and the bottom layer to Luminance L.
I used the heart 4 element and the purple flower elements from the kit the heart I re-sized a little to fit nicely. Arranage them on the frame one on each side.
Now pick another paper of choice I used paper 2 from the kit copy and paste it as a new layer onto your canvas and move it to the very bottom, then add your mask which I provided the link for above. Now I took the black glitter trim from the kit copy and pasted it on the canvas above the paper we just added a mask to, duplicate it several times enough to cover the the masked paper. Merge them together and then add the same mask, merge group then I added a little noise and change the blend mode to hardlight.
Now you can copy and paste your main tube as a new layer at the top of the palette, duplicate it and go to adjust-blur-gaussian blur set to 3 and change then blend mode to overlay add a drop shadow to the bottom copy of the tube. You can also add a drop shadow to the frame layer.
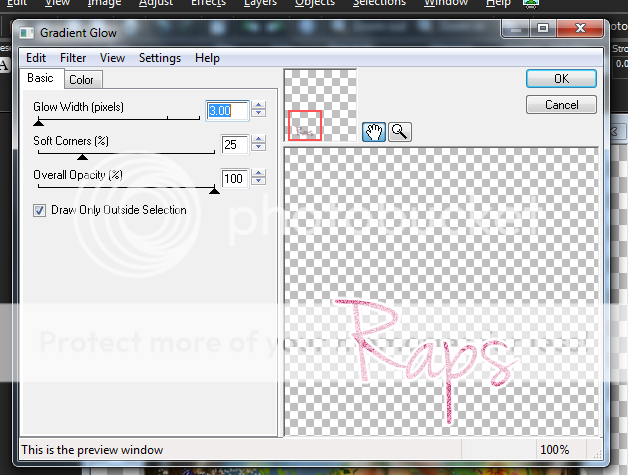
Now in your font of choice we're going to add your name along with a gradient glow and a drop shadow, you can use the same drop shadow you used earlier mine which was H&V 2 Opacity 45 and Blur 4.
Finally add your copyright and license number if applicable save as png or jpeg whichever you prefer and we're done!
I hope you enjoyed this tutorial and found it easy to follow.
I would LOVE to see your results to any tutorials that you do, you can email results to me or post them on my page on facebook if you have a facebook account.
Saturday, November 12, 2011
Proud to Annouce
I am very proud and honored to announce that I have been asked by the wonderful people in charge of The Art of Giving to join their CT. I am honored to work with the wonderful scrap kits and tubes that these generous artists and talented scrap kit makers have donated to The Art of Giving. Please check them out at the link above, you won't be disappointed and it is such a good cause.
Here are some snags using the gorgeous scrap kit by Rabid Designz called Let it snow. You can view and hopefully purchase this scrap kit HERE.
Please click the tag for full view and save them to your computer to use.
These are for PERSONAL USE ONLY.
Thank you!


Thursday, November 10, 2011
Sunset Fay
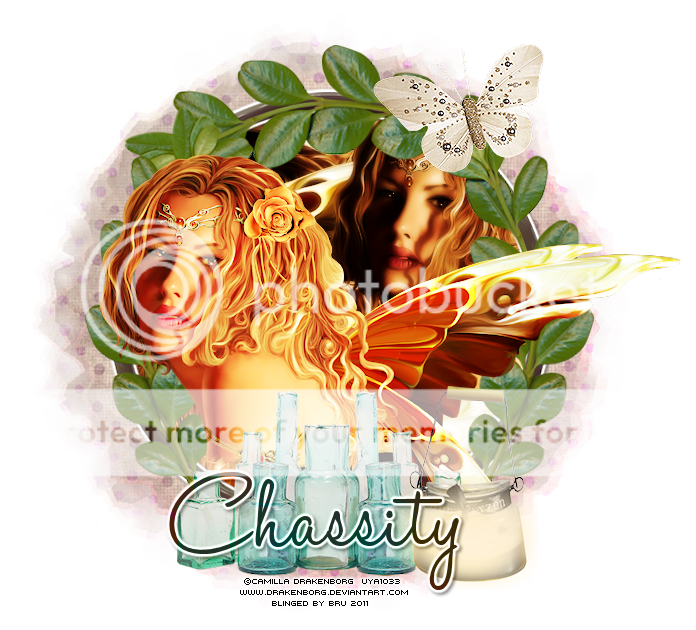
*Click the tag for full view*
This tutorial was written by Brunette on November 10th 2011.
Any similarity to any other tutorial is purely coincidental.
Do not copy and paste my tutorials or claim as your own you may link to them for group challenges.
What you'll need:
You'll need a tube of choice I am using the gorgeous art of Camilla Drakenborg. You can purchase her art for signature tags at Up Your Art HERE.
Be sure to check out all the other great artists there!
Fonts of choice - I am using a pixel font for the copyright and Halo Hand Letter for the name.
A kit of choice I am using part of a AWESOME collab kit by the girls at Pimp My Tags With Scraps which is called Girls of Pimp my tags with scraps which you can purchase HERE.
I am using Polka-dot Scraps portion.
Eye Candy 4000 - Gradient Glow
Xero - Radiance
Mura Meister's - Copies
Mask of choice - mine is from weescottlass creations which you can find HERE.
I used mask number 219 you'll see on the right side they are bundled in bulk downloads :)
Ready?
Let's get started!
Open up a new 700x700 transparent canvas I always crop it later so it will be smaller I just like enough room to work.
From the kit open up frame 2 copy and paste it as a new layer onto your canvas, re-size it a little if you need to. Now we're going to take the magic wand and click INSIDE the frame then to go selections-modify-expand by 3 then open up a paper I uses paper 11 from the kit copy and past it as a new layer. Now go to selections-invert and hit delete move this layer below the frame. DO NOT deselect yet. Open up your tube copy and paste it as a new layer then go to Mura Meister's - Copy and I used the wallpaper settings just leave the numbers as is. Now you should have a bunch of parts of your tube in the circle, you can deselect it now. Duplicate it and change the blend mode of the top layer to overlay, then I added Xero Radiance you can just click random a few times to get a setting you like, it sort of depends on the colors in your tube.
Open up leave 4 from the kit copy and paste it as a new layer onto your canvas now I made it so it went around the circle frame. So I had to re-size it a little then duplicated it and mirrored it, I duplicated it again and rotated it to the left 90 degrees. You can move this layer below the other leave layers so it looks all together or even use your eraser tool to remove some of it.
Copy and paste your tube as a new layer, mine was not a full tube only half which is fine cause we're going to decorate the bottom of the frame anyway. Duplicate your tube layer and change the blend mode of the top layer to screen. On the bottom layer of your tube add a drop shadow I used H 2, V 2, Opacity 45 and Blur 4.
I used the bottles from the kit re-sizing them a little so they fit nicely and placed them on the bottom part of the frame and over my tube. Duplicate and mirror. I also used lamp 1 from the kit re-size that a little and move it to the right bottom by the bottles. I used the butterfly at the top right.
Copy and paste a paper of choice I used paper 11 from the kit move this layer to the bottom of all your layers. You can re-size it a little then add the mask, open up another paper I used paper 8 repeat the same steps. Now change the blend mode of this paper layer to Luminace L.
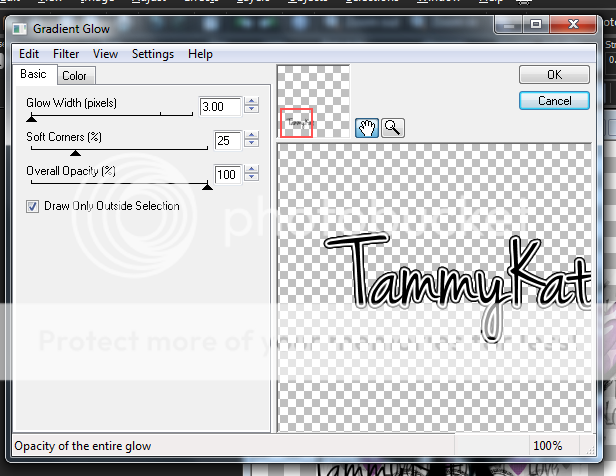
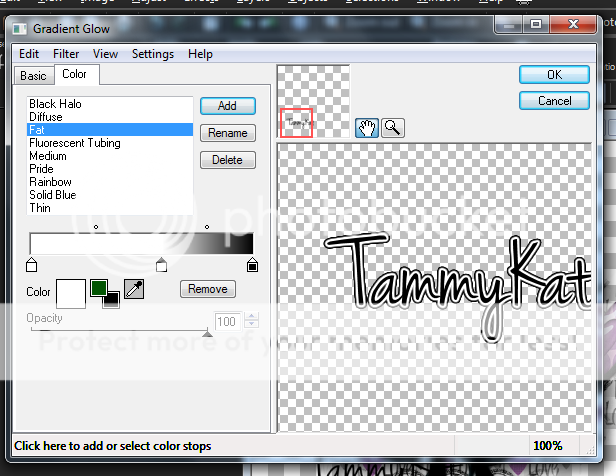
Now in your font of choice we're going to add your name along with a gradient glow and a drop shadow. The drop shadow is the same as mentioned earlier. My gradient glow settings are shown in the screen-shots below. Then change the blend mode to Luminance L.


Finally add your copyright and license number if applicable save as png or jpeg whichever you prefer and we're done!
I hope you enjoyed this tutorial and found it easy to follow.
I would LOVE to see your results to any tutorials that you do, you can email results to me or post them on my page on facebook if you have a facebook account.
Monday, November 7, 2011
Film Noir

*Click the tag for full view*
This tutorial was written by Brunette on November 7th 2011.
Any similarity to any other tutorial is purely coincidental.
Do not copy and paste my tutorials or claim as your own you may link to them for group challenges.
What you'll need:
You'll need a tube of choice I am using the gorgeous art of Robert Alvarado. You can purchase his art for signature tags at PSP Tubes Emporium.
Be sure to check out all the other great artists there!
Fonts of choice - I am using a pixel font for the copyright and Angry Blue for the name.
A kit of choice I am using part of a AWESOME collab kit by the girls at Pimp my tags with Scraps which is called Girls of Pimp my tags with scraps which you can purchase HERE.
I am using Designs by Pimp'd Designz's portion.
Eye Candy 4000 - Gradient Glow
Xero - Radiance
Ready?
Let's get started!
Open up a new 700x700 transparent canvas I always crop it later so it will be smaller I just like enough room to work.
Open up frame 4 from the kit copy and paste it as a new layer onto your canvas re-size it a little if you need to. Now take a paper of choice I used paper 6 from the kit then take your eraser tool and carefully erase the stuff outside of the frame. Move it below the frame later. I used the close up of my tube copied and pasted it as a new layer under the frame layer and erased the same as I did for the paper. Duplicate it and arrange it on the other side. Merge these two layers together then duplicate them then go to adjust-blur-gaussian blur set to 3 then add Xero Radiance keep hitting random until you get an effect you like. Now we're going to take another paper I used paper 10 from the kit and use your eraser tool same as earlier. Make sure ALL your layers are below the frame layer.
Take the film piece element from the kit copy and paste it as a new layer re-size it a little and rotate it 20 degrees to the left arrange it near the bottom of the frame. Duplicate and mirror it arrange this layer near the top of the frame. These layers should be BELOW the frame layer as well.
Copy and paste your tube as a new layer ON TOP erase the part that overhangs the frame. Duplicate your tube layer and change the blend mode to overlay. Add a drop shadow to your bottom tube layer V 2, H 2 , Opacity 45, Blur 4.
Open up the cherry charm from the kit re-size it so it fits nicely and move it to the top right corner of the frame. Add the same drop shadow as earlier.
Open up the paper element from the kit copy and paste it as a new layer move it below all the other layers. Rotate it 90 degrees to the left re-size it if you need to and make it so its poking out the side of the frame. Duplicate, mirror and re-size it a little moving it on the OTHER side. I used did the same thing with the red glitter rotated it 90 degrees to the left and arranged it so it looked like it was hooked on the frame holding the paper so it must be on top the frame layer. Duplicate, mirror and re-size it a little arrange it on the other side where the paper is sticking out.
I used paper 12 from the kit and added a mask. You can use whatever mask you like or none at all its up to you.
Now in your font of choice we're going to add your name along with a gradient glow and a drop shadow. The drop shadow is the same as mentioned earlier just do it again but change the V&H to -2. My gradient glow settings are shown in the screen-shots below.


Finally add your copyright and license number if applicable save as png or jpeg whichever you prefer and we're done!
I hope you enjoyed this tutorial and found it easy to follow.
I would LOVE to see your results to any tutorials that you do, you can email results to me or post them on my page on facebook if you have a facebook account.
Secret Garden

*Click the tag for full view*
This tutorial was written by Brunette on November 7th 2011.
Any similarity to any other tutorial is purely coincidental.
Do not copy and paste my tutorials or claim as your own you may link to them for group challenges.
What you'll need:
You'll need a tube of choice I am using the gorgeous art of Alena Lazareva. You can purchase her art for signature tags at Up Your Art HERE.
Be sure to check out all the other great artists there!
Fonts of choice - I am using a pixel font for the copyright and Jenna Sue for the name.
A gorgeous FTU kit by Wicked Princess Scraps which you can download as an exclusive kit on facebook for the AOG page HERE.
You can find more info about this page and what it is about HERE
Eye Candy 4000 - Gradient Glow
Ready?
Let's get started!
Open up a new 700x700 transparent canvas I always crop it later so it will be smaller I just like enough room to work.
Open up the circle scalloped Frame copy and paste it as a new layer onto your canvas. Now take your magic wand and click INSIDE the frame then to go selections-modify-expand by 3 now open up a paper of choice I used paper 11 from the kit. Copy and paste that as a new layer re-sizing it so it fits nicely then to go selections-invert and hit delete. Move this layer BELOW the frame if its not already there.
Now we're going to open up the wooden trunk from the kit, copy and paste that as a new layer ABOVE the frame layer. Re-size it a little to fit nicely then open up your tube copy and paste it as a new layer over the wooden trunk. Duplicate the tube layer then go to Adjust-Blur-Gaussian blur set to 3 then change the blend mode of this layer to soft light and lower the opacity a little.
Next I copied and pasted the grass and tree1 onto my canvas re-sized them a little and placed them where they looked best. With the tube I am using it comes with extra layers, I used one of the layers that had leaves and pasted it below everything BUT the frame. I think that gave it a nice touch.
Now we're going to add your name in a font of choice make sure to use a light color I used pink. I added some noise to do that go to Adjust-add/remove noise-add noise - uniform and monochrome checked -noise at 50 percent. Then add a gradient glow settings I used shown in the screen-shot below. Add a drop shadow I used H 2, V 2, Opacity 45, Blur 4 then changed the blend mode to Luminance L.


Finally add your copyright and license number if applicable save as png or jpeg whichever you prefer and we're done!
I hope you enjoyed this tutorial and found it easy to follow.
I would LOVE to see your results to any tutorials that you do, you can email results to me or post them on my page on facebook if you have a facebook account.
Subscribe to:
Posts (Atom)


